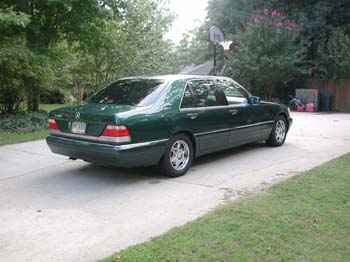
This is a how-to guide to fix ticking hydraulic valve lifters in the Mercedes 119 motor - aka the 5.0L V8. This article is of my own making, and from my own research. If you use any of the material within then, like me, you're on you're own. You can't hold me or anyone else responsible for whatever, so if you don't feel comfortable doing this sort of mechanical work, then take your car to an authorized mechanic.
If you've been reading around the forum at peachparts.com lately, you'll know the main reason I bought an S500 was for the motor. I am just infatuated with the Mercedes V8s. But these motors aged more than say 3-4 years will exhibit a common annoyance that can usually be dealt with fairly easily - hydraulic lifter ticking. As most of you know (and laugh), I tried every oil additive on the market to get rid of the proverbial lifter ticking noise so common on the 119s. Actually, most additives - like Marvel Mystery etc actually worked for about 5-7 days, which is usually long enough for some salesman to buy one from auction and sell it. Anyway, then the good stuff would evedently boil off leaving behind the carrier whatever that was. Then we were right back to this surprisingly loud ticking from the hydraulic lifters. People would turn their heads standing on the side of the road it was so loud.
Problem is the bottom (exhaust) lifters are just not getting oil underneath the lifter where the valve stem hits when a series of certain little parts fail. That's what these little plastic Oil Guides do. Note - they used to be metal, but Merc wanted them plastic for 2 reasons I'm told. #1, if they come apart somehow, loose plastics in the cam area are must less troublesome than loose metal. #2, they needed a pressure relief mechanism, and they're a bit more elastic than metal. The end-cap of the Oil Guides are just pressed on (see pics for a better explaination), and with a catalyst like too thick an oil, a blocked filter, or some other high oil pressure reason they'll just pop off and eventually steal oil flow to the lower cylinder head assemplies. In my experience, it's been heat that's killed them, but what do I know. There's a picture below of a popped guide that I have just removed from the motor. See what you think.
The lifters on this motor are hydraulic in nature of course, and the oil is the hydraulic part. They float on this oil. I've seen where you can actually shim these lifter cups, but evidently mine didn't need it. I've seen good mechanics (like Gilly et.al.) that can do this in their sleep. But IMHO this is a testament to the Mercedes bullet proof engine design. The accessories are another story, but internally most MB motors are extremely tough and seem to last forever. Even under the most neglectful conditions. Like the idiot who leased my car when it was new and it still had factory oil in it 50k miles later!
But let's get started, and we'll do a roughly $1,200.00 job if done @ the dealer. I had $230.00 in parts. See Phil on this website's "FastLane" for the parts at a good price. You'll need 16x Oil Guides, 8 per side. Also two gasket sets, one left and one right. You'll also need 18 crush washers for the valve cover bolts. If you want to cover the bases, think about the plastic cam chain guides that you'll have to pop off on the front. I notice Phil's got them for like $40 or so.
You'll need a 5mm hex (I used the kind that fit onto the 3/8"s drive of my ratchet). You'll need an 11mm socket, and a 10mm socket for the plug grounding wire. Snapon has them for about $4mil ea. I might note that I buy as many of my tools from Snap On as I can afford,, and what I can't afford I'll go to Sears. Yes, IMHO Craftsman has superior tools. And you can't beat the lifetime guarantee from either source.
Before we get cranking, remember to keep as much dirt out of there as you can, especially on the cam races where they meet the cam shaft. Also, avoid heavy torques on any of this. My manual shows just 10ft/lbs for the valve covers, and 12ft/lbs for the cam brace bolts. Remember, the whole thing is aluminum and the bolts are much harder than the female threads, and will strip quickly. After torquing initnally, I then went back to see if they had settled which they had, and one valve gasket was actually squirting oil. another firm-down and that fixed that.
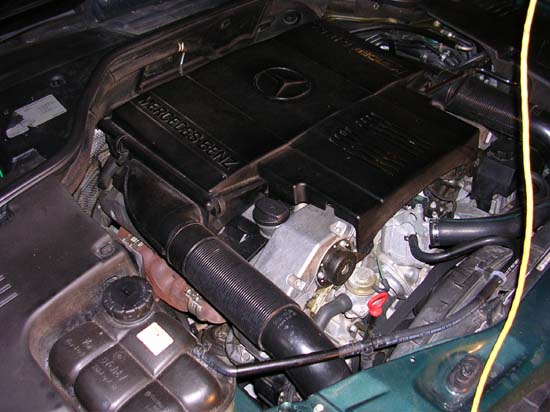
Here it is before I got going. Right rear cyl was ticking the loudest, supposedly it also runs the hottest.
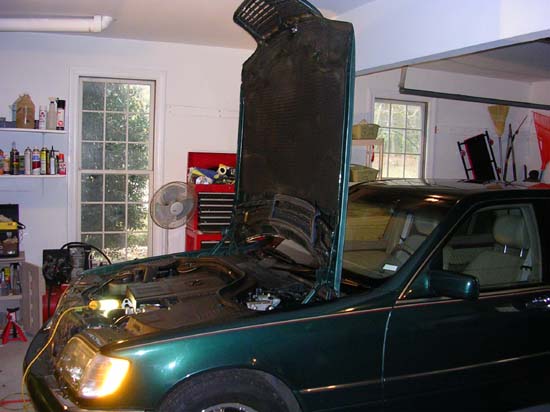
Yall remember these hoods will go vertical by just pushing the release on the hinge. Took me about 3-4 good bumps on the head before I got the idea, and up it went.
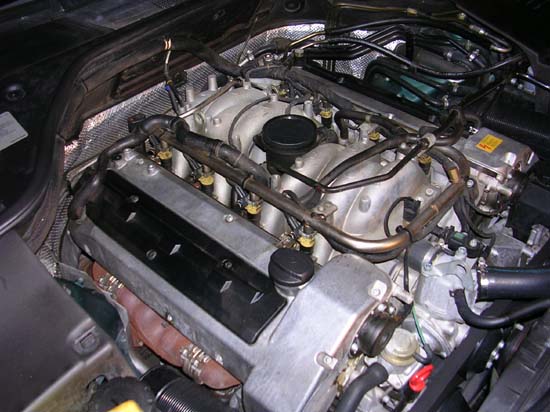
All the air handling stuff taken off. I'm going to do the passenger side first, since it's the noisiest. A few of the valve cover bolts were loose! Slight leaks here and there.
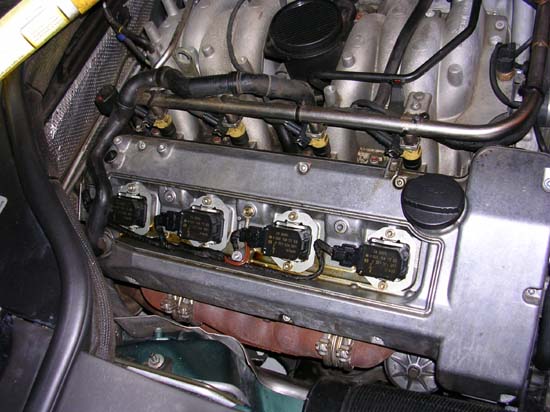
Take the little plastic cover off, and remove the plug actuators. No need to remove the plugs themselves. Note the oil pooling in the bottom, and the plug wells themselves were filling up with oil. The new gasket kit comes with four new plug well gaskets that will keep oil in the valve area and out of the wells.
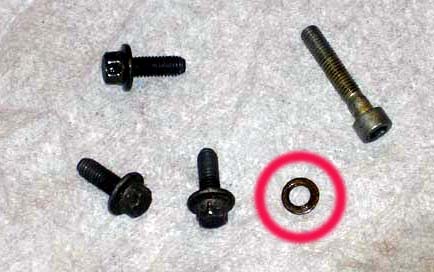
Some of the old crush washers. Remember to get 18 of these new- they're about $1.00 ea.
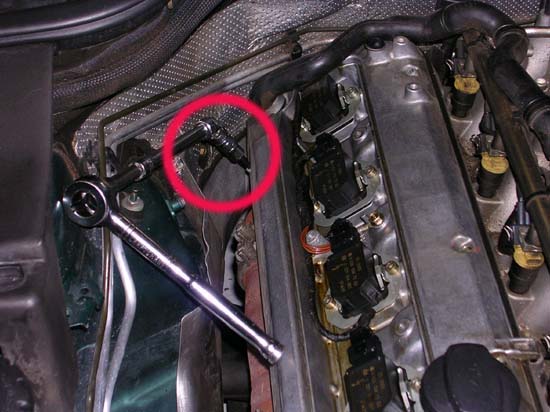
A good Ujoint on the wrenches helps out quite a bit down in the back of the motor.
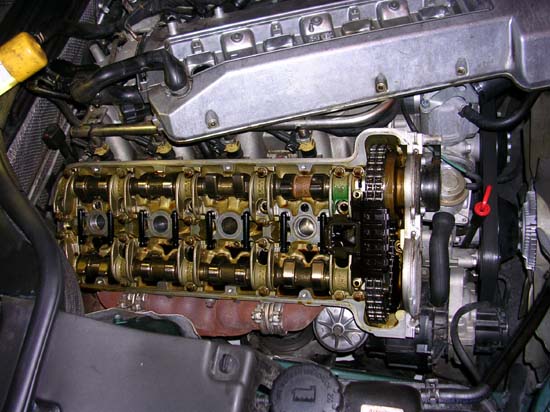
Plug connectors off, just set the valve cover aside. Notice the little oil guides, two were broken (popped ends). Looking forward on the intake cams, are you starting to wonder how I'm going to get to the one oil guide way up front by the cam chains?
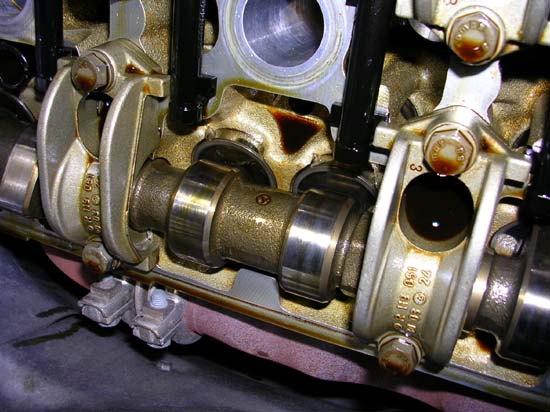
A good look at a few of the cam lobes, right above the lifter that was not getting oil. All 3 of these little oil guides were popped on this side. Notice the cam braces, they come right off with just the two 11mm bolts. I looked around for the little plastic ends, but couldn't find them. I would have really liked to have gotten them out of there so I'm assuming they made their way to the oil pan and stayed there. Next time I pull the oil pan I'll get them then. Needs a new gasket anyway.
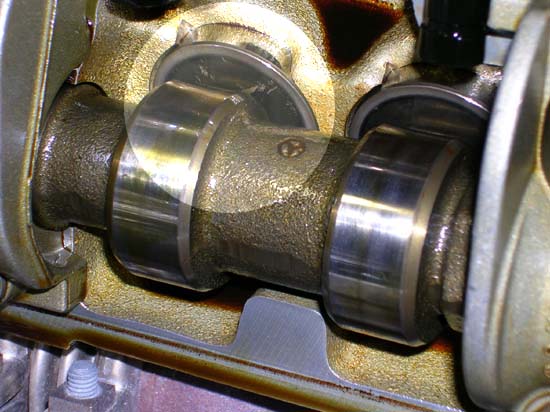
A little closer look at the top of the "Cam Follower" (Lifter). Notice some slight, but evident scaring. I really didn't know what to make of this. Remember, to replace these lifters the camshafts have got to come off which I'll do later. Just not now.

This little plastic piece, the cam chain guard, has got to come off in order to get to the four bolts on the cam brace. So in order to take the cam followers off, you lift those little tabs up at the same time, and reach below again at the same time and release the bottom catch. Then you use your toes to release the sides... 4 hands would have been nice here (see sleeping help in picture below). I thought this was awfully brittle plastic. It broke into a # of pieces, so I just replaced it. They're relatively cheap, again Phil has them.
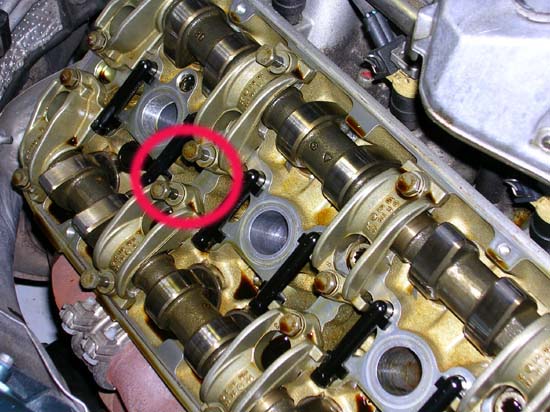
Just a pic showing the bolts on their way out to remove the cam brace, which in turn uncovers the little oil guides. You've got to do this all the way down the motor - ONE AT A TIME. Do not take all the cam braces off a the same time.
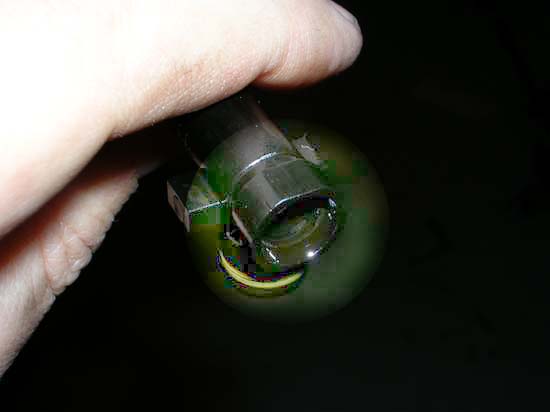
The culprit. I've just removed this one from the cylinder head.
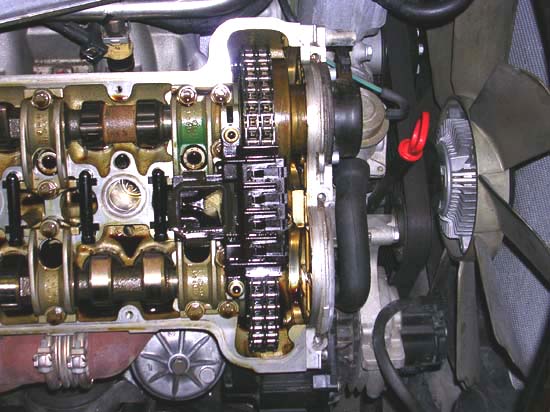
Just another photo of the front, showing the stuff that's got to come off to get to that front oil guide. It didn't take long, however.
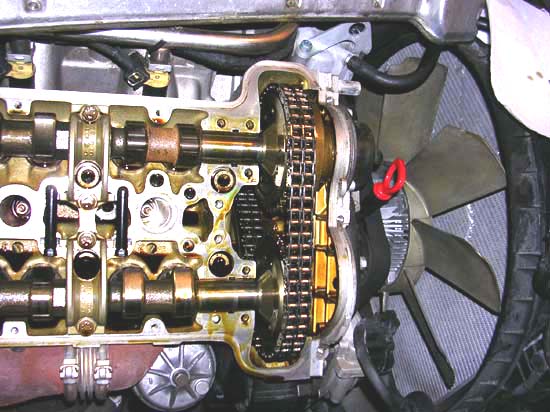
Here's the same area, this time with the covers of the cam chain guides removed. I haven't replaced the oil guide yet, just removed it. Notice how the oil comes from the top of the head, through the oil tubes, and down into the exhaust lifters/valve stem area? Also these chain guides just below are a known problem for this motor and eventually must be replaced anyway. The holes you see in the cam gear are for pins that you insert to align the cams so you can remove them. This way you don't have to worry about camshaft rotation problems during reassembly. I remember seeing on Jim F's website a link for a handy tool that would align camshafts for removal. That's for another day though.
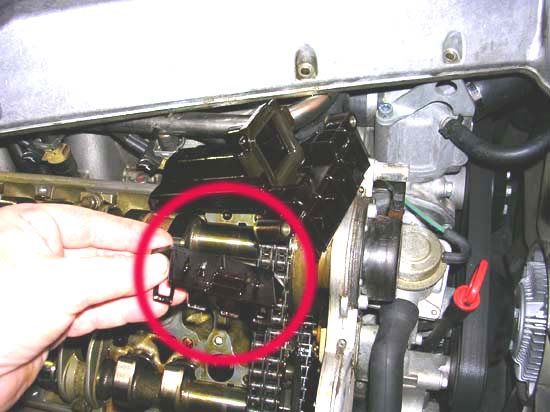
It's hard to see in this photo, but here's a shot of these plastic chain guides. Like I mentioned earlier, there's a reason these are plastic as metal fragments would foul the cam chain, and promptly take out the entire motor when the valve timing goes nuts and blows a hole in a piston, pops a valve, bends a cam or something. One of these plastic chain guides came apart as I was removing it, and sent pieces into the smaller parts of the chain housing. They had to come out, so I soaked up the oil with a towel and there they were. These parts are extremely inexpensive, like $10 here and there. See Phil, but I'd suggest you replace them while you're in there. If this comes apart at runtime, it could make the chain jump. Again, in a worst case scenario, that will ruin the motor.
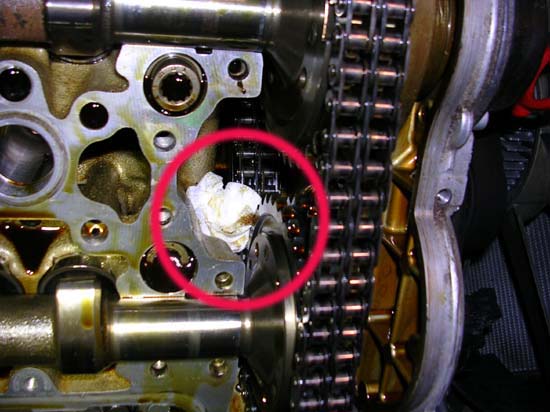
Just soaking up some oil so I could find the brown plastic pieces and get them out. This plastic is the exact same color as the oil. Imagine that.
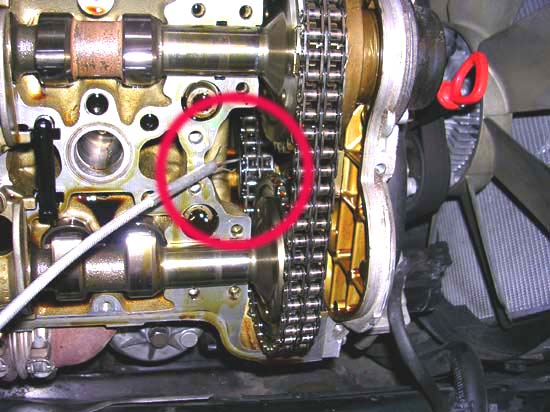
Here I used my trusty grabber-thinger to get the plastic pieces out. For some reason the kids love this thing and I usually find it laying out in the yard somewhere.
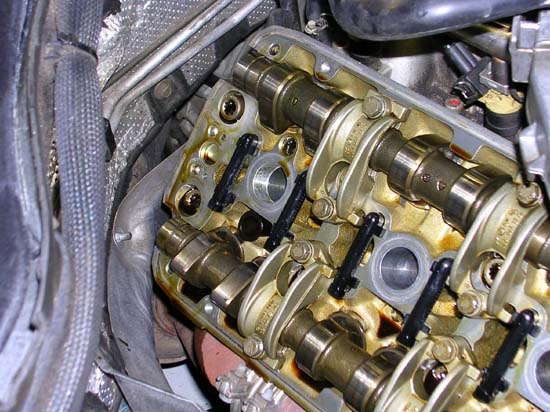
Just another shot with the other side off. I've just replaced the oil guide down there. Other than being a little hard to get to, this one was no more difficult than the rest.
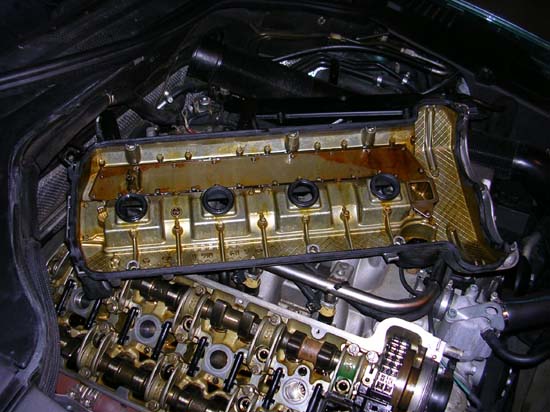
Gasket goes back onto the cover. Don't forget the 4 little spark plug well gaskets, that come with the kit. These supposedly keep oil out of the plug wells.
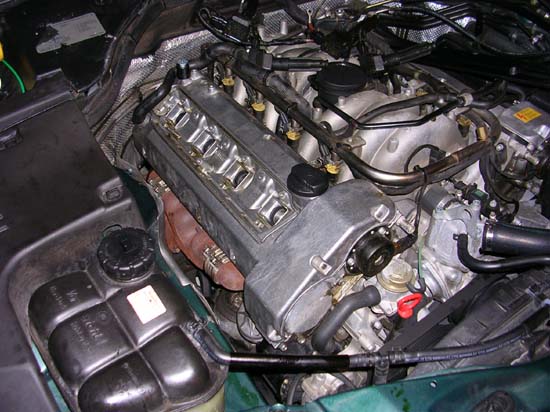
Cover back on. I didn't show it well, but there's a little metal oil tube on the back of the cover that fits into a rubber funnel, which goes down into the head. Much easier via a picture to try to explain, just make sure it aligns and finds it's place. Also, when bolting the head back on, bolt it on like you do wheels by staggering the tightening. Makes the gasket sit more flush and less prone to leaks. Clean the flat surfaces of the head (I just used a toothbrush) the best you can where it meets the gasket. BTW - ever notice how the magnetic cam adjuster (seen in the front) collects little metal particles LOL. Also note pesky placement of thermostat, which took me better part of an afternoon to replace.

New squish washers. Like noted earlier, they're about $1.00/ea, and you'll need 18 of them (9 per side).
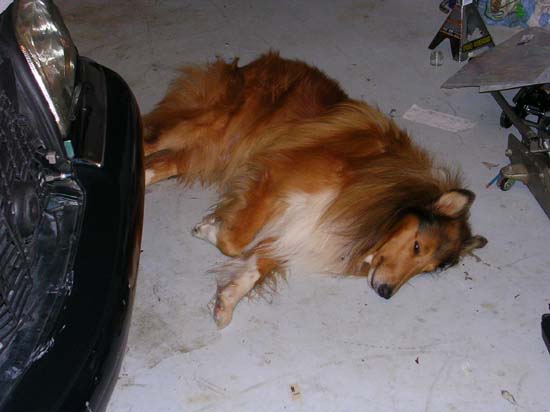
My help, sleeping on the job. This is Duncan, one of my champion male Collies. He's one of 4 I keep in the house. Say, did I tell you I like Collies?
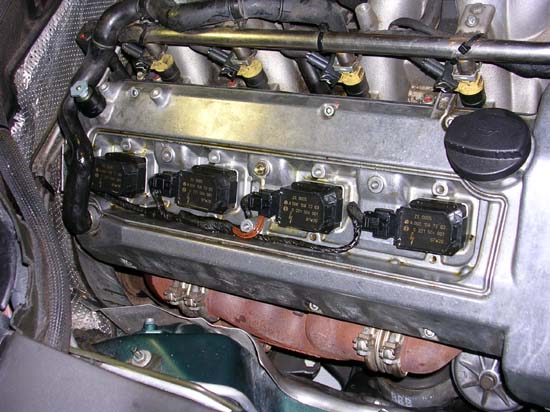
Clean up all the loose oil and mess on this outside area. My plug wires were soaked in oil, dried them the best I could with some chemicals. So far, this hasn't presented a problem.
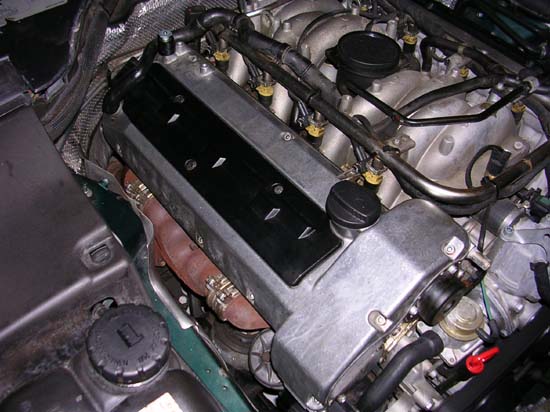
And it's back together.
To wrap it up, I got all the tools off the motor, and started it up. I heard the proverbial tick-tick-tick, and thought to myself oh great, I've just wasted my time, and maybe this thing is pre-disposed to just tick for the next 20 years.
But about 10 secs went by as the motor idled, and they got a little quieter. Quiter and quieter, 30 secs and you couldn't even hear them at all! I drove it for about 1/2 hour, checked for more leaks, and viola. Lifter ticking problem is fixed. It's absolutely amazing how quiet this motor is when it's well lubricated. You'll probably have to re-tighten the valve-cover gaskets, they compress over time.
Hope you were able to make use of this - I think you'll find this is (in the scope of pro mechanics) a fairly simple job. But for an amateur like me it was truly a fun project. Oh, and did I mention that out of 4 MB shops I spoke with, none had ever had a 5.0L motor in there for damages caused by ticking lifters, other than valve stem shims. Even from motors that had this problem for years. So it's safe to say it's just downright annoying, and could cause some stem-seat wear over a long period. Another testiment to this motor's granite-tough design.
Now - on to the next project!
Greg B
CategoryDiy